Creating 3D logo from type using StudioPro Blitz
|
ACG Home |
Instructor Home |
Class Home |
list of tutorials |
StudioPro Blitz is the latest, PowerMac-only version of a long-standing 3D software. Unlike other programs we have seen before, it is not the clear winner in its field since the 3D marketplace is very fragmented. It does, however, follow the user interface approach used by all the dominant players, and it embodies all the major aspects of 3D work: modeling, rendering, and animation.
Basic Logo:
- Change the configuration of the computer for 3D work:
- Use Apple-->Control Panels-->Extensions Manager
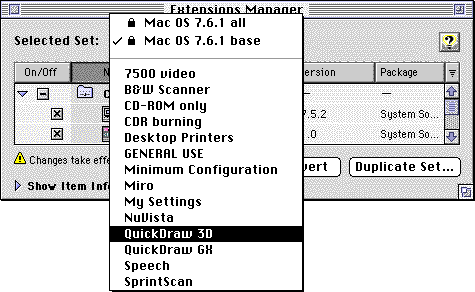
- Choose the 'QuickDraw 3D' set from the 'Selected Set' pop-up menu. Close the Extensions Manager window.
- In the Finder, use Special-->Restart to reboot the computer and load the selected extension set.
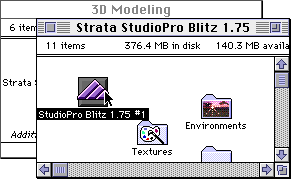
- Find the application icon in the 3D Modeling folder and start the program:
- Use File-->New to create a new document.
- Display the Preferences dialog with Edit-->Preferences. Make sure that 'Use QuickDraw 3D Interactive Renderers' is checked.
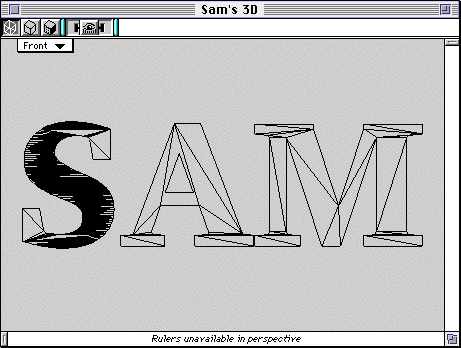
- Choose the Text tool (the 10th from the top in the left half of the toolbox, marked with a 'T'). Click in the document window to bring up the text entry dialog:
- Type a few letters in the field at the top of the dialog, such as your initials (to keep file size and processing time down, we cannot have a large amount of text).
- Choose a typeface from the 'Font' pop-up menu. For best results, make sure to choose either a 'TrueType' or 'ATM' font, as indicated after you release the menu. Also, avoid typefaces with complicated outlines, since they will drive up the file size and the processing time.
- Use the Magnification tool (the 3rd from the top in the left half of the toolbox) to get a closer view at the type you created.
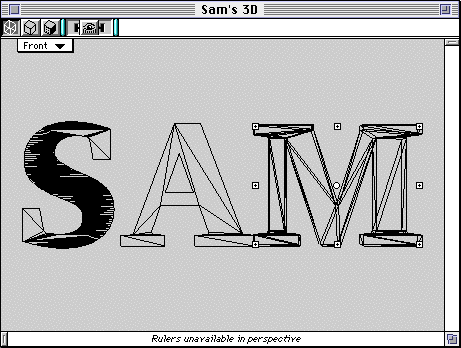
- Click on the icon at the top-left of the document window to switch to wireframe view:

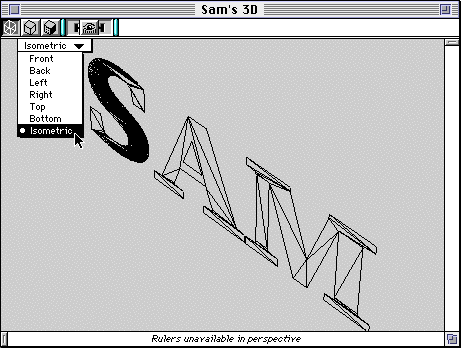
- You can switch to isometric view to verify that the type is a flat object (use the pop-up menu at the top-left of the document window). Make sure to return to Front view afterwards.
- Choose the selection tool (top-right of Toolbox), then use it to select the type.

- Use Modeling-->Ungroup to separate the letters, then Selection-->Select None to deselect.
- Now select one of the letters so it can be converted to a 3D object

- Use Modeling-->Swept Surfaces-->Extrude. Extrusion is a basic technique available in most 3D programs. It converts a 2D outline into a 3D slab, optionally adding a bevel to the edges of the slab.
- The Extrude comand (or the Extrude button, 3rd from the left in the Button Bar at the top of the screen) brings up the Extrude dialog:
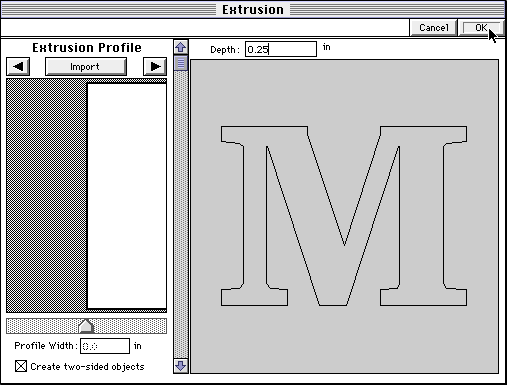
- In the dialog, make sure that the rectangular (default) profile is visible on the left, and that "Create Two-Sided Objects" is checked.
- Enter the thickness of the letter in the "Depth" field (0.5 inches seems like a good starting point).
- Click "OK".
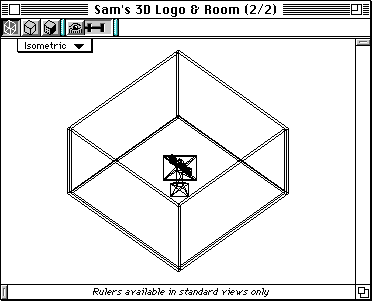
- The selected letter is now a 3D object, since Extrude added thickness to it. Look at it in Isometric view to check. Make sure to return to Front view afterwards.
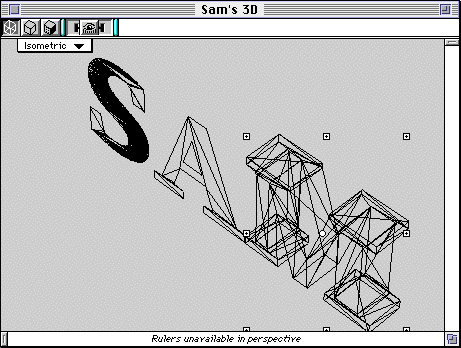
- Continue processing additional letters in the same manner, until all have been turned into 3D objects (make sure to always return to Front view before using the Extrude command)
You can also experiment with different depth values to vary the appearance of each letter.
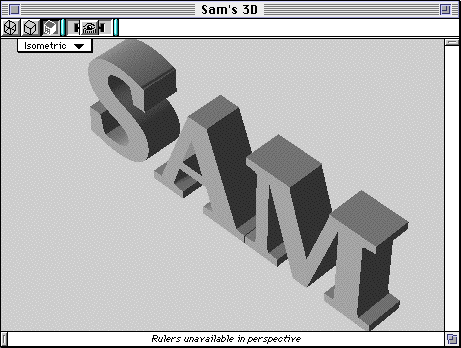
- Once you have converted all the letters to 3D objects, you can create a more interesting composition using the transformation tools:
- Translate (= move) by dragging with the selection tool (1st at the top-right of the toolbox)
- Change orientation with the object rotation tool (2nd from the top in the right half of the toolbox)
- Change size with the scale tool (3rd from the top in the right half of the toolbox)
- The transformation tools operate differently depending on which one of the 8 handles on the bounding box of the selection you drag. Experiment, and if you don't like the results make sure to use Edit-->Undo right away (this program only provides one level of Undo).
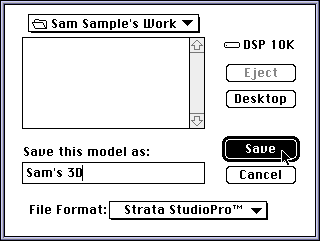
- Make sure to save your work: File-->Save As, choose StudioPro format, enter any filename you want.
Optional Additional Elements
If you have time, you might want to use some additional modeling tools to create a more complex scene. You can again start from a flat 2D shape, converting it to 3D using a second command generally available in all 3D programs: Lathe. Or you can start directly with basic 3D shapes called Primitives.
Creating a Lathed Pedestal
- Change your view of the workspace
- Switch back to 'Front' view, if necessary.
- Turn off the Perspective projection (this will make it easier to align objects accurately)
- Move the lens slider (at the top of the document window) until the label next to it says 'Orthographic'.
- Zoom out to see more of the workspace
- Option-click with the magnification tool (3rd from the top in the left half of the toolbox).
- Pan the camera down to see more of the workspace under the logo
- Click on the Pan tool (1st at the top-left of the toolbox), use it to drag down the top handle on the camera view box.
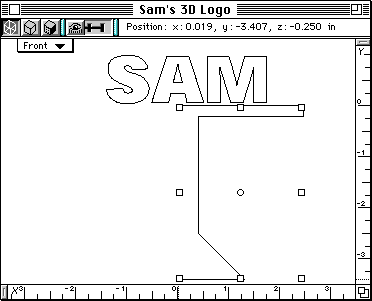
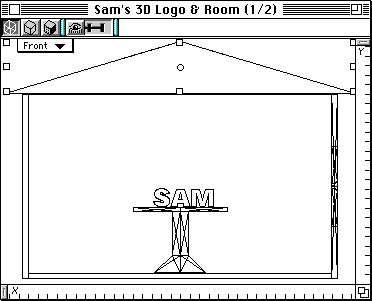
- Draw the outline of the pedestal
- Choose the Open Polygon tool (in other programs called a Polyline tool). Use it in a connect-the-dots fashion to create a series of connected straight segments, with the first and last points disconnected.
- Click just below the center of the logo to establish the starting point of the polyline.
- Click to establish additional vertices of one half of a front view of the pedestal. To create vertical and horizontal segments, hold down the Shift key while clicking.
- To complete the polyline, return to a location aligned below the starting point, and double-click. An example of a completed polyline is shown below:
- Lathe the outline
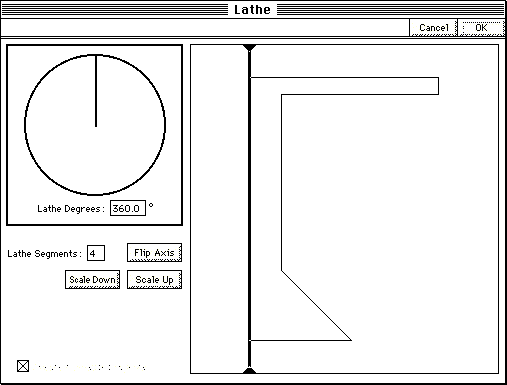
- With the profile still selected, use Modeling-->Swept Surfaces-->Lathe (or the Lathe button, 4th from the left in the Button Bar at the top of the screen) to display the Lathe dialog
- In the dialog, make sure that the axis is vertical (click 'Flip Axis' if it isn't), and drag it so that it touches the starting and ending points of the polyline.
- Enter 360 for Lathe Degrees (so that the profile sweeps fully around the axis, leaving no gaps in the pedestal).
- Enter 4 for Lathe Segments (to create a square top for the pedestal)
- Click 'OK'.

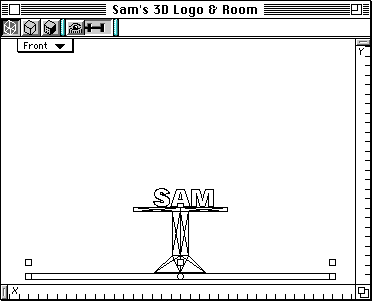
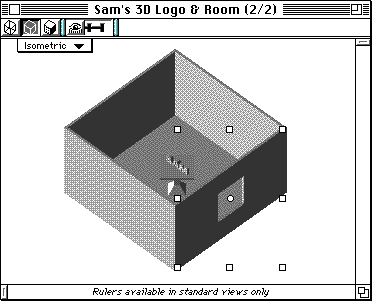
- If necessary, adjust the pedestal to fit the logo
- Make sure to look at the scene from at least three views (e.g., Front, Top, Right), and resize and reposition the objects until the logo rests on the pedestal the way you like best.
- A sample shaded isometric view of the scene is shown below:

Building Up a Room From 3D Primitives
- Change your view of the workspace
- Switch back to 'Front' view, if necessary. Later, while drawing, you may have to switch to other views--make sure not to draw in 'Isometric' view, since objects won't align the way you probably expect them to.
- Return to Wireframe mode.
- Zoom out and pan as needed to see more of the workspace around the pedestal and logo.
- Create the floor and walls
- Use the Cube tool (5th from the top in the right half of the toolbox) to draw a thin slab under the base of the pedestal.
- Switch to other views (Top, Left...) to verify that the slab extends beneath the pedestal to create the floor of the room.
- If necessary, use the Scale tool to resize the slab, and the Selection tool to reposition it.
- Repeat the same steps to add 4 more slabs for the walls.
- Cut windows and doors out of the walls
- Use the Cube tool to create a box that intersects one of the walls.
- Switch to other views (Top, Left...) to verify that the box goes through the wall.
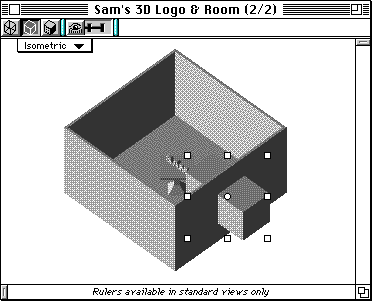
- Select both the wall and the new box, then use Modeling-->Boolean Modeler to bring up the Boolean Modeler dialog
- Make sure that the wall cube is selected in the list on the left, and the new box in the list on the right.
- Choose 'Subtraction' from the pop-up menu at the bottom-right, leave 'Smooth Final Surface' checked, then click 'OK'.
- Click 'OK' again in the 'Smoothing Options' dialog which appears immediately after.

- The shape of the box is used to cut out a portion of the wall, leaving a window opening.
- Repeat the process for additional windows and/or doors.
- Add the roof
- Switch to the Top view
- Click and hold on the Regular Solid tool (6th from the top in the left half of the toolbox), and choose 'Pyramid' from the pop-up menu that appears.
- Draw a pyramid covering the entire room.
- Switch to the Front view, and use the Scale tool to flatten the pyramid until it looks like a roof.
Before leaving, make sure your file is saved so you can continue working with it in the next session.
Additional Info:
- Documentation on the latest additions to StudioPro, including the VRML features, is available in Acrobat format on the ACG lab file server (GX), in the Manuals folder.
- The Art Computer Graphics program of Fullerton College offers two classes covering 3D topics, ACG120:
3D Computer Graphics for Macintosh and ACG150:
3D Computer Animation for Macintosh. Look them up in the class schedule.
Copyright by Sandro Corsi. Last modified 20 APR 98.