Sound recording using SoundEdit
|
ACG Home |
Instructor Home |
Class Home |
list of tutorials |
SoundEdit can be used for two important functions:
- Sound Recording, and
- Sound editing and special effects.
For our project, we will use both sets of features to create a soundtrack for the animation that will be displayed in our web pages.
Sound contents
- Background ambience noise or music. This is generally looped to save on file size.
- Sound hits synchronized to specific events in the animation.
Basic operation:
- Launch the SoundEdit application, found in the Sound folder on the hard drive.

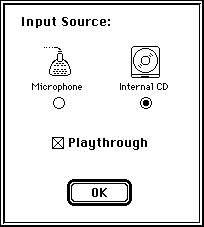
- Use the Recording Options command in the Modify menu to choose the sound source. Most of the machines will show two options: Microphone and Internal CD. The microphone port can accommodate a special Apple microphone (only available for a few machines), or your own sound playback device with a miniplug connector (such as a cassette player). The internal CD-ROM drive (available on most of our computers) will allow recording from ordinary audio CDs. If checked, Playthrough will let you listen to the sound source through the computer's speaker(s)
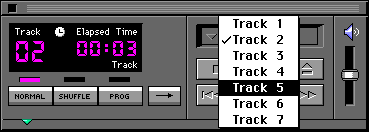
- If you selected Internal CD, use the Apple CD Audio Player (in the Apple menu) to select a track for playback.
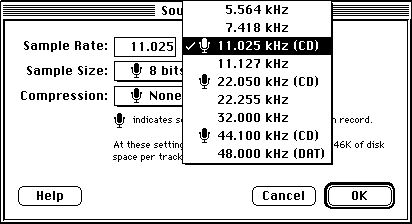
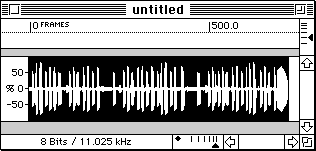
- Use the Sound Format command in the Modify menu to choose 8 bits, and the lowest one of the Rates marked with a microphone icon. Make sure to leave Compression turned off.
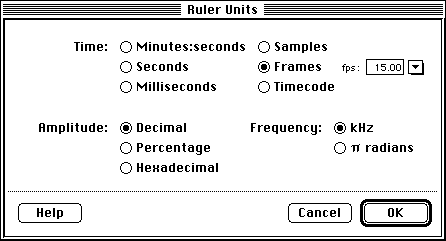
- Use the Ruler Units command in the View menu to choose Frames as the unit. In the field that appears next to Frames, enter the frame rate you selected in Director for your animation.
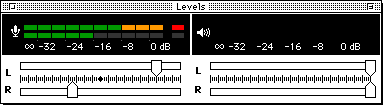
- If necessary, use the Window menu to display the Levels palette. You may also have to expand the palette (clicking on its zoom box) to see the control sliders. Start your sound source, and adjust the recording sliders (indicated by the microphone icon) for the best levels: loud enough to show many green bars in the meter, but not so loud that yellow and red bars appear. In the example pictured here, the left channel (topmost in the display) is set too loud, while the right channel is too soft.
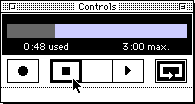
- Press the record button when your sound source is properly cued up.

- Press the Stop button when done recording.
- A waveform graph representing the newly recorded sound will appear in the document window.
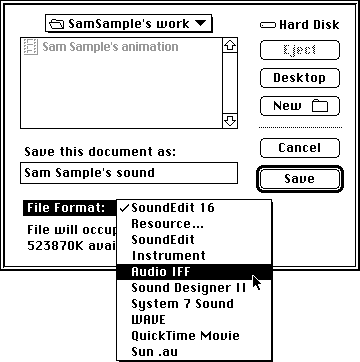
- Use the Save command in the File menu, choose Audio IFF as the file format.
Additional Info:
- Balloon help for SoundEdit is available by using the Show Balloons command in the Guide menu.
- The Art Computer Graphics program of Fullerton College will offer a class on sound recording and editing, ACG68-Sound for Multimedia, soon to be available in the class schedule.
Copyright by Sandro Corsi.Last modified 29 SEP 97.