Transforming letterforms using Illustrator
|
ACG Home |
Instructor Home |
Class Home |
list of tutorials |
Illustrator is one of the most widely used programs (along with FreeHand and CorelDraw) for editing artwork such as logotypes, insignia, diagrams, charts, etc. These are the same kinds of images that traditional artists would create with a combination of pen-and-ink and airbrush. In computer graphics, this is generally known as vector, or object-oriented, or draw images. Each part of the pictures is stored by these programs as a geometric formula rather than a list of colored dots. The advantage is that each shape can be scaled and deformed smoothly, and storage requirements (on disk and in memory) are generally modest. The drawback is in the somewhat constrained range of artistic styles that can be used.
Illustrator is another large program with many features. In addition, the operation of some of its drawing tools is not as intuitive as the painting tools in Photoshop. In this introductory class we will use only some features to create a logotype based on your name. This image will be eventually transferred to a 3-D program and converted to a solid object.
Basic Operation:
- Resetting the program to factory defaults
- Before you start up Illustrator, open the Preferences folder, inside the System Folder on the Hard Drive. Find the file Adobe IllustratorTM 5.5 Prefs and drag it to the Trash.
- Now find the Illustrator application icon, in the Draw folder on the Hard Drive, and double-click it to start the program.
- A blank, untitled document window appears. On the left you will see a palette of tools. Click on the 'T' to select the Type tool.
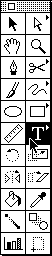
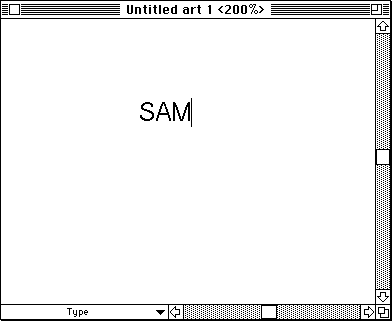
- Move the cursor over the document window: the arrow changes to the standard 'I-beam' type cursor. Now click within the document's outline: a flashing insertion bar appears, allowing you to type.
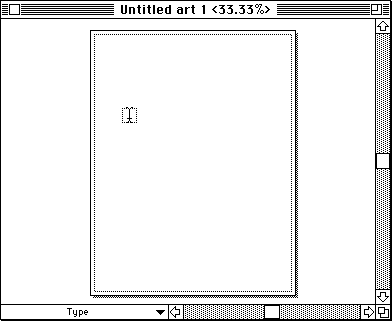
- As you type you will notice that, as in PageMaker, it is impossible for you to read the text.
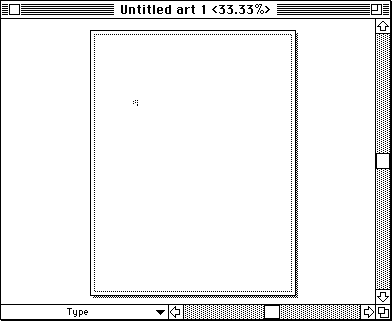
- Based on your experience with PageMaker, you already know that the view of the document needs to be magnified. Click on the Magnifier tool in the Toolbox.
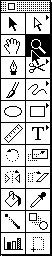
- Click and drag with the Magnifier tool in the Document window to draw a dotted box around the type you just entered.
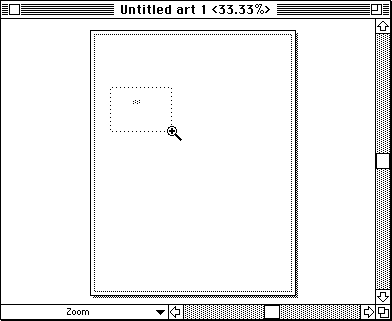
- The area you selected will be magnified to fill the window, so you can see what you typed. Select the Type tool again: you may now add/delete text using the standard editing techniques. Since we will convert the type to a 2-D object, it is important that you type no more than a few letters: your first name or initials, for instance.
- When done typing, select all the text by dragging over it with the type tool
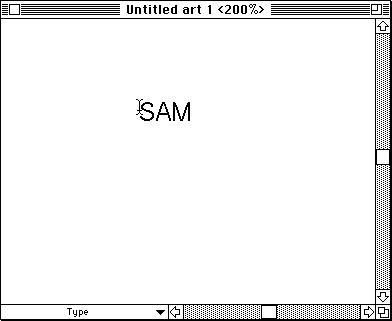
- You can now choose a typeface, type style, and size from the Font and Type menus.
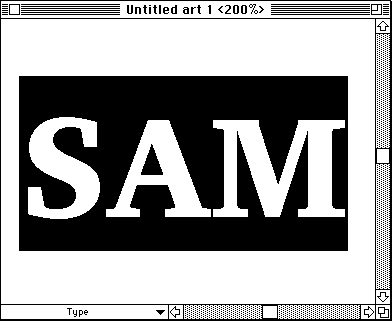
- After deciding on the best formatting, you can proceed to convert the type to a graphic image. This lets you change and combine the shapes of the letters as appropriate for your logo. Remember, however, that the letters will be no longer considered type, so that you won't be able to change font and style without starting again by retyping.
- First make sure the type is selected as an object (indicated by a baseline and insertion handle), not as text (indicated by white type on a black background). Switch to the black arrow tool and click where the baseline of the type is located (that's at the bottom of capital letters, and of such lower case letters as 'x' and 'm').
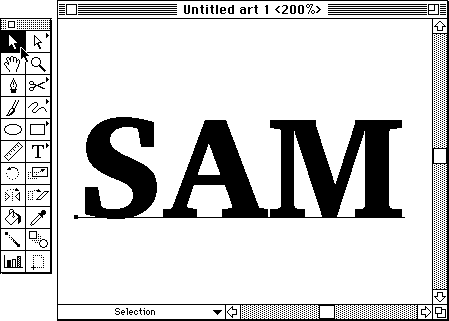
- Now use the Type-->Convert to Outlines command. The baseline disappears, and small black boxes (control points) appear along the edge of the letters.
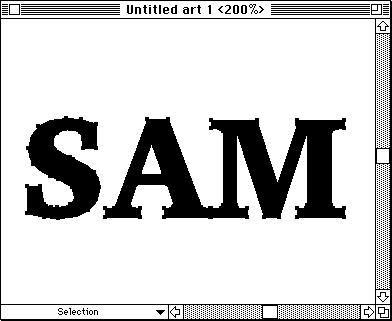
- Illustrator lets you work separately on the shape of the objects in your image (Artwork mode), and the rendering attributes such as fill and outline colors (Preview mode). Since we will do all our coloring in the 3-D program, we can focus on the shapes alone by selecting Artwork in the View menu.
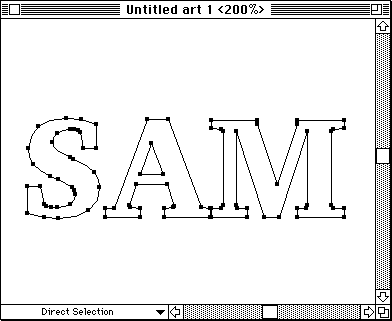
- To complete the logo, choose the white arrow tool in the Toolbox, then click on the Document window away from the letters (the control points will be hidden). Now you can click and drag on the outline of the letters to reshape them.
- When done, make sure that your document is saved (File-->Save, leave 'Illustrator 5.5' selected as the file format).
Additional Info:
- The complete manual for Illustrator, in Acrobat format, is available on the ACG lab file server (GX), in the Manuals folder.
- The Art Computer Graphics program of Fullerton College offers a class covering in detail both Illustrator and FreeHand, ACG112-Electronic Illustration. Look it up in our class schedules.
Last modified 24JUN96 by Sandro Corsi